
What goes into my images
If you want to take better landscape photos stand in front of something more interesting

One of my favourite images, all about the light & location. Dove Lake, Tasmania
If you want to take better landscape photos then stand in front of something more interesting, if that doesn’t work then stand in front of it more often.
I’d love to say my skills as a photographer is the main thing behind my images but for me the above saying says it all, great locations & persistence to get ideal weather conditions. Look at any landscape photo & there will nearly always be these two main elements that will be the big difference from a nice image to a great image. Ideally you’d like both to increase your chances of getting that shot but sometimes a spectacular spot can make up for not so perfect conditions & still produce a great image. And other times the light will turn what otherwise is a pretty ordinary scene into a work of art.
Since purchasing my first camera in early 2017 ive been fortunate enough to be able to spend a lot of time travelling & exploring fantastic locations across the country. Which is something you need when you drive everywhere like myself, Australia is pretty big & simply driving to your next location can take up a lot of time. And with that time im able to chase the ideal conditions around the country depending on the seasons, ideal conditions for a landscape photographer & the type of photos I like to take often means contending with the likes of rain, wind, cold & humidity. A lot of people don’t have the luxury to be able to devote so much time to there hobby, then to spend that time in what you hope will be ideal conditions and not get that shot you were hoping for, suddenly that early morning hike doesn’t seem like the best use of your precious time.

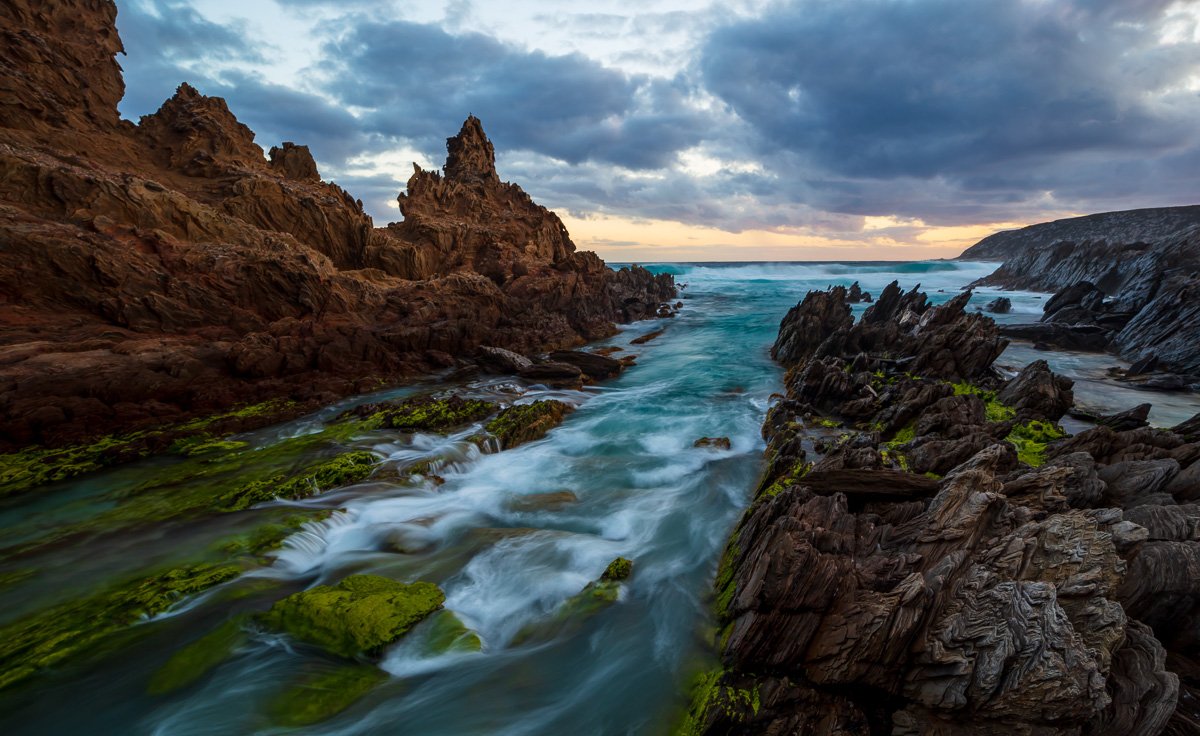
Sunsets after rain seem to often provide fantastic colour. Petrel Cove, South Australia
So how do I try & increase the chances of getting that great shot?
Chasing that bad weather
I love cold, cloudy, miserable weather! Maybe its from growing up on a farm in Australia with long hot summers & experiencing many droughts that I used to relish any cool wet weather we’d receive. Luckily for me it also suits my passion of photographing nature & hiking in cooler weather makes it a lot more comfortable. So my main tool is the Bureau of Meteorology which is Australia’s weather agency, known in Australia simply as The BOM. If im planning a trip I like to look at the long term averages of the areas im interested in visiting to find out what months they usually get a reasonable amount of wet/cloudy weather, the last thing I want are sunny days followed by more sunny days. Once Ive worked out a few suitable areas I then look at the long term outlooks, these give you the chances of exceeding above average rainfall/temperature for the next month. This information gives me a pretty good idea on what location should have some interesting weather for my trip. When visiting the deserts of central Australia rainfall can be very sporadic so even using the weather apps it can be very hard to plan for good weather, although it is useful for checking recent rainfall if planning to photograph desert wildflowers or waterholes in the creeks & gorges. Checking recent rainfall is also particularly helpful if you plan on visiting waterfalls, most of Australia’s waterfalls are best visited after some good rain. Once ive set out on my trip I then keep up to date with the weekly forecast & checking it daily. Sunny days generally aren’t great for taking great photos but are perfect for scouting out sunrise/sunset spots so when you do get some better conditions youll know where to go to take advantage of it. Keeping a eye on the weather radar is helpful too particularly with fast moving storms. When im in remote areas with no mobile phone reception I use my satellite phone to get updated weather forecasts from family members.

After two weeks of endless blue sky there was finally some storms on the forecast so decided to head out earlier then planned to Chambers Pillar to try to make the most of it. Northern Territory
The downside can be if you get day after day of endless wet weather which can be pretty frustrating & uncomfortable when camping but you just make the most of it. It also keeps a lot of the tourists away so much more peaceful. When im not travelling & just at home I still regularly check the local forecast so I know what days might be good for a sunrise/sunset shoot at the local beach etc.
Finding that location
I never have a strict schedule when travelling & mainly use google maps to work out the national parks & natural attractions in the area. Ill have a list of places I want to visit but will be pretty flexible, quickly moving on to the next location or extending my stay due to a better forecast. Satellite view on google maps is handy too for looking for some interesting rocky coastlines etc. I often find written descriptions of a area describing the local landscapes helpful too rather then solely relying on online image searches. Another way to find some great locations is to talk to some locals, its surprising how many times ive been told of lesser known spots to visit from chatting to people on there morning walk or stumbling onto local photographers while out & about.
At the end of the day though you just cant beat getting out there & exploring for yourself rather then too much online research. It can take a bit of the magic away viewing a lot of images of a area your about to visit, much better to see them first in real life then on a screen. Also viewing very beautiful photos before you leave for the trip can be inspirational but if you don’t get similarly good photos it can be a bit of downer even when you may in fact be still taking good quality photos. And no matter what, you can find yourself taking similarly composed shots of the images you viewed online rather then working out your own composition.
When arriving at a new location I like to find a suitable spot for sunrise & sunset asap so if there is some colour in those first few days I hopefully wont miss out. While out scouting even in sunny weather when I don’t often take many good photos I still like to always have my camera gear with me just in case, and sometimes at night I will compare scouting photos to help decide which one is worth spending more time at. If I find one particularly good spot then ill often go to it for both sunrise & sunset to better my chance of getting good light there. I also time myself on most walks/hikes so I know when to set my alarm for sunrise & when to set out in the afternoon for sunset.

A cascade I stumbled upon on a cold cloudy day while exploring Mount Field NP, Tasmania
Beating the crowds
Being out in nature is always much more enjoyable when theres less people about so I always try to do my travelling outside of school holidays to beat the crowds, particularly the real popular tourist areas. You have less chance of people getting in your shot, more freedom to move around for different compositions, generally cheaper accommodation & you usually don’t have to book in advance to get a campsite so you can be more spontaneous & flexible with your schedule. With campgrounds less crowded its usually a lot quieter too so easier to get a early/good nights sleep in for that early morning sunrise shoot. Sunrises are my favourite time to photograph with less people about & no footprints at the beach, just beautiful smooth sand. So even if you are somewhere in the busy season getting up early is definitely worth it. It can also help when photographing popular spots to get there well before sunrise/sunset so you can find a good place to set up, even better if you’ve scouted out the best composition earlier so you know exactly where to go straight away. The more your enjoying yourself its more likely you wont have any problems finding the energy to get up early or adding that extra hike, which in return will pay dividends.

A very popular National Park but on a weekday outside school holidays theres no trouble with crowds. Lamington NP, Queensland
Be creative
No matter how well you plan sometime things just don’t go your way. I love visiting central Australia for instance & it is a landscape that photographs well with a big blue sky or the late afternoon light glowing on a rocky gorge, but if you get a week or two of endless blue sky which is very common your photos can all look a bit alike after a while. This is when you have to get a bit more creative, wether it be using my 70-300mm lens & focusing on smaller details of the landscape, taking close up shots of interesting patterns in the sand/rocks or taking advantage of the clear skies by having a go at astro photography. Using a drone is another fantastic way to take great photos when theres not much happening with the weather by mostly or completely eliminating the sky & focusing on interesting patterns in the landscape looking down from above.
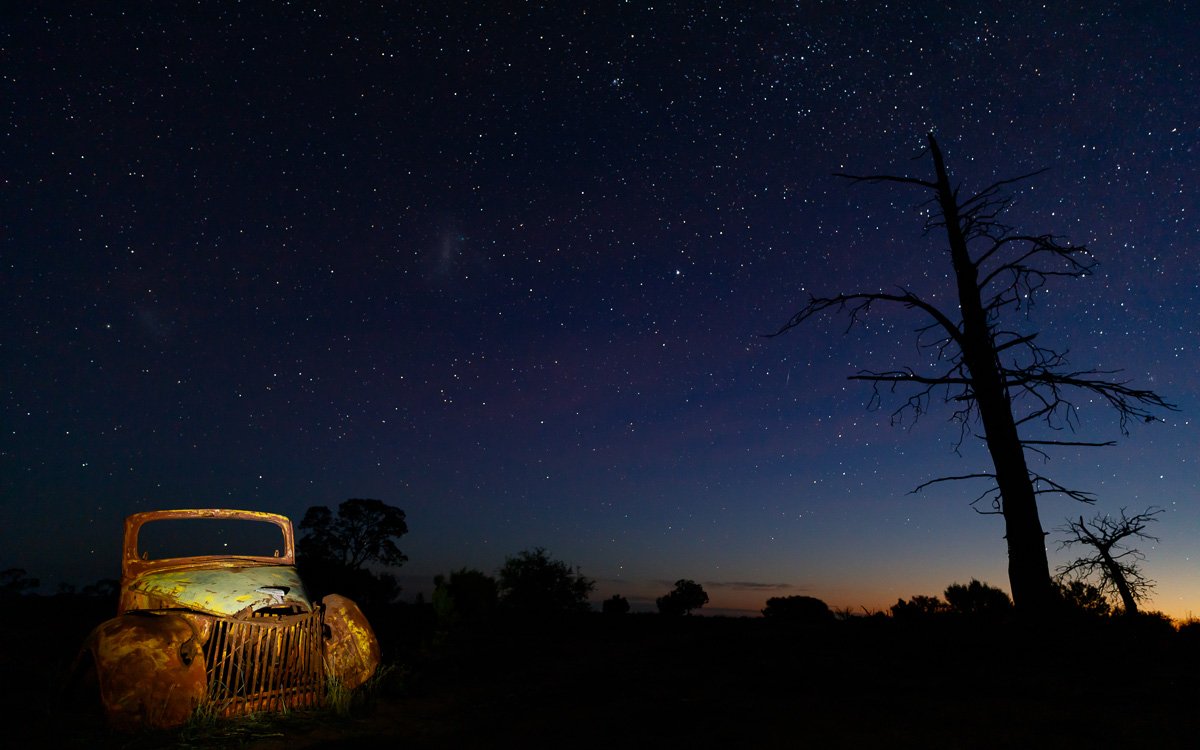
With nothing but clear skies on the forecast I decided to visit this old truck after dark & with a head lamp I highlighted the truck under the stars. Pink Lakes NP, Victoria

Mid afternoon on a sunny day at the beach – Esperance, Western Australia
Luck & persistence
Sometimes you just get very lucky. Driving back into Bermagui around sunset after a afternoon of showers I could see a bit of colour developing, trying to think of a spot that looked west all I could think of was the Marina. Took this within a minute of parking the ute & within another minute or so most of the colour had disappeared.

Bermagui Marina, NSW
Sometimes you have to be persistent. Most of the time the only visible bit of this shipwreck is one or two pieces sticking out of the sand but after some wild weather & high tides a lot of it had been revealed. After hearing about it on the news I spent a week there hoping to capture a good shot before it was again covered in sand. During that week I didn’t get any I was happy with so a few weeks later I spent another week there & finally got this sunrise.

Sunrise with no footprints or people. Buster Shipwreck – Woolgoolga, NSW
When your alarm goes off a hour or two before sunrise & you turn it off still half asleep only for it to be taken over by the sound of rain on your tent it can be so easy to just go back to sleep, or reset the alarm to just before sunrise & go to a spot not as photogenic but a lot closer. But the weather can change quickly & most of my favourite sunrise/sunset shots were taken just after rain with often the most stunning colours mixed with interesting clouds. The opposite can often happen too, poking your head out of your tent & seeing a sky full of stars, only to wake up around sunrise with high cloud colouring up & you left thinking what if. I also find if you do regularly get up early for sunrise (particularly when on a photographic trip) then your body will adjust & I will often find myself waking up 5 or 10 minutes before my alarm. I hate being rushed so I like to get to my spot before or around first light so I can set everything up & just sit & watch the light change. As a landscape photographer you have to be persistent.
Conclusion
Theres only so much we can do & a lot of the time it just doesn’t eventuate. But when it does go your way, to have your camera set up at a beautiful location & to watch mother nature put on a show while you capture it is priceless & makes up for all the disappointing times. So if you want to take great landscape photos, spend less time worrying about your gear or any rules of photography & as much time as you can outdoors enjoying nature & its bad weather.

Frozen – During the night I could hear sleet/snow on my tent & next morning I was greeted to this. Mount Kaputar, NSW

Photographing Honey Possums
The worlds only true nectar-eating marsupial

South-West Western Australia is one of the worlds richest biodiverse hotspots with a incredible amount of unique flora & fauna thats crammed into one corner of Australias largest state. One unique creature & has to be one of the cutest is the Honey Possum (Tarsipes rostratus). Being the worlds only true nectar-eating marsupial, these little guys pretty much exclusively live on nectar & a bit of pollen so require nectar rich flowers all year round. Something the flora rich south west provides in abundance, although sadly these days due to land clearing for farming are now mostly restricted to national parks & reserves.

Licking the pollen from a Calothamnus flower
And did I mention little! Adults weigh around 7 to 10 grams with a body length between 60 to 85mm while there prehensile tail is 85 to 100mm long. There tongue is a impressive 18mm long & like nectar feeding birds have bristles on the tips of there tongue to collect the nectar. Males are smaller then females but have very large testes & the largest sperm of any mammal in the world.

Feeding on a Regelia velutina flower
While mainly nocturnal they can be active during the day, particularly early/mid morning & mid/late afternoon, even throughout the day in cool cloudy weather. Which was very handy as I could get my sunrise/sunset landscape shots in before changing lenses & focusing on the possums. During my visit I found them to be very active both early/mid morning & mid/late afternoon with very few out in the middle of the day. The young ones can be easily spooked but otherwise there main focus is nectar so if you don’t make any sudden movements/noise theres no issues getting close to them, I even had a few run in-between my legs while they were chasing one another. The main issue was getting a shot that included there eyes as when feeding on the Calothamnus flowers there whole face would often be obscured.

Not only do they need plants but plants need them too as they are excellent pollinators shown by the amount of pollen on this ones head
I started out with my 150-600mm lens but had to quickly change to my 70-300mm lens as i found 300mm was a pretty good length & shooting handheld the lighter lens was much more comfortable. As with all my photography including wildlife i used single shot instead of burst mode. Apart from when they have there head in a flower they rarely stop, all that sugar & a insatiable appetite! So I would set myself up close to some flowering shrubs which at the time of my visit was mainly a Calothamnus species with there bright red flowers. I would never have to wait long for some to appear although some of the New-Holland honeyeaters would swoop & harass them a bit but this didnt occur often. It was such a joy to watch them for long periods & to see some of the positions they get themselves in to reach each flower makes for some great photo opportunities.

They have a short life-span of 1-3 years
All these images were taken from a walking track, I did not go off track. Phytotophthora dieback is a plant pathogen that is a big problem in south-west WA & kills a number of native plant species. It can easily be spread by soil from your shoes so is important visitors stay on the marked walking tracks. Just one of the many threats to these incredible & fascinating little creatures. You dont need any special gear or tramping around off track to photograph Honey Possums, just a bit of patience.

Scientific name: Tarsipes rostratus – rostratus meaning Beaked in latin, referring to there long snout

Improving my photography
One question ive been pondering over is am I stuck in a bit of rut
If you want to get better at anything then you cant beat learning on the job & gaining experience over time spent in the field. Photography is no different & I think it has served me well with my portfolio improving year on year. If I come across a issue or problem I will try to solve it myself while out photographing, failing that I will then search online at night for some solutions & apply it in the field the next day. Other then that my main focus is doing what I love, exploring nature with camera in hand. Over the last few years though as my hobby as turned into a bit of a obsession ive been often wondering how my photography has improved over time & more importantly how can I continue to improve. Photography like everything you never stop learning.
One question ive been pondering over is am I stuck in a bit of rut. Now 2023 I think would be one of my best years simply going on the number of photos I took that have gone on my portfolio (ill be the first to admit I need to be more strict on the photos that make the cut but I am getting better) with a few being in my opinion my best results yet, largely due to the fact that i did a lot of travelling that year to some incredible places. So im still taking photos that im really happy with but are little habits/preferences holding me back in some situations. I love the creativity photography allows you but have I relied more so on the scene/conditions of late & let my creativeness take a back seat.
So I thought id share my goals/ideas that I came up with that I think will help me continue to improve & evolve my photography. And I have to say it has already begun to help in the last year or two.
Landscapes = Wide angle lenses
When I first started out one of my purchases was a 70-300mm lens as I read it could be good for some landscape scenarios like photographing distant mountains etc. But really for me it was wide angle lens for pretty much every scenario & would rarely even consider the longer lens. Going back over my images I struggled to find more then two landscape photos with it. Theres obviously nothing wrong with this, I love wide angle shots of landscapes. But the fact that it would mostly not even enter my thoughts to consider a longer lens there are some situations that im missing out on. Not only potentially good photos but photos that are a bit different to my usual wide angle landscape photos to something a bit more intimate. Add to that enjoying the creativity of focusing on smaller details in the landscape it has to be a win win. So I have made it my mission when out in the field to not only consider the longer lens more but to learn how to & when to use it with landscape photography. So far most of my landscape photos have still been taken with my 21mm wide angle lens (my only wide angle lens is a Zeiss milvus 21mm) which I knew wouldn’t change but I have been taking many more with the longer lens recently & some im really happy with that wouldn’t be possible with the wide lens.

Reflections – Frankland River, Western Australia. Canon 5DS + Canon 70-300mm @ 93mm, ISO 100, 0.6 Sec, F/13

Mount Trio - Stirling Range NP, Western Australia. Canon 5DS + Canon 70-300mm @ 70mm, ISO 100, 1/13 Sec, F/13
Getting lazy with scouting
A must for a landscape photographer, you have to know where to set up your camera when conditions are good & it’s something I still spend a lot of time at particularly when im in a area that’s new to me. On longer walks/hikes i always have all my camera gear & I do just as much exploring as I did when I first started out so no big issues there. One thing I have found myself doing differently though is when I do find a good scene im spending less time on working out the best composition by taking different shots with the camera on the tripod. I have started getting into the habit of once finding a spot Ill quickly work out if its worth re-visiting in better light by looking at live view on the camera or taking a few quick photos hand held. But wont work out the best composition then & leave it till I return for the better light. When I return I usually leave plenty of time so I can set up & work out the best composition before the good light starts. But plans don’t always work out & a few times lately ive found myself a bit late & has been a bit of a scramble to find the best composition while the light & conditions were still good. Ive also found myself sometimes at a spot waiting till the light starts to come good till I even get my camera out then try to work out the best composition. The same thing again when I don’t think the conditions will be any good so I don’t set up, then suddenly it does & it’s a scramble again. Or worse yet decide to leave early then having to run back because suddenly its turned good. For the most part this hasn’t become a big problem yet but is something I think I need to be a bit better at before it does.
The three images below are from a stunning beach in Fitzgerald River National Park, Western Australia. I found it while out exploring & without taking any photos I knew instantly that I had to return here in better light. With mostly clear skies I didn’t return for sunset but the next morning was much better. I arrived well before sunrise & as it became a bit lighter I decided on this composition below which I ended up staying at till around sunrise. I quite like this composition although the bit of sand im not crazy about & would prefer some of those rocks closer/more prominent in the foreground.

Take one

Take two - I finally moved my composition around sunrise to this which I think is better, luckily for me the light was still ok.
Take three - This one was taken on the same day at sunset & while the light wasn’t anything special I really like the composition. I wish I had worked all this out at the start so I could of focused on the second & third composition
Sunny isn’t always bad
I love overcast conditions, when im out in the garden, at work or even just swimming at the beach it doesn’t matter. And that certainly goes for when I have a camera in my hand as well. Sure you need some sun to produce some great light but ill take a overcast day with no sun over a clear sunny day most of the time. That’s not to say I don’t take any photos on clear days, I actually have quite a few from over the years & some from my last trip. But apart from when im in central Australia (Sometimes its hard to get any cloud no matter how long you stay) I don’t go out with a clear plan on what would make a good shot on a sunny day, its more become about sheer luck. Take the photo below for a example from my last big trip, it was pure luck I chose this walk over another one for this particular sunny morning. Taking photos wasn’t really on my mind that day as there was some cloudy/stormy weather on the forecast for the rest of my stay & I may of left my camera bag at the campground for my walk if I wasn’t using the pockets in the bag to put the rubbish in that I picked up along the beach (So sad to see the devastating impact we humans have & continue to have on the environment). Im so glad I did too because I love this image, it shows off so well the stunning beaches that Esperance is famous for. But it could have so easily gone unshot. Hopefully I can start to think more about taking advantage of sunny conditions then just waiting it out for the stormy weather.

Cape Le Grande National Park, Western Australia
Squarer crops
Occasionally ill get a suggestion that one or two of my photos would look better with more of a square crop then a more traditional aspect ratio like 16:9. Its something ive never been able to do to any of my pics, it just doesn’t look right to me for a landscape photo. Even when I can see with a few of my photos that there is some space on both or one side doing nothing for the image & it makes sense to do a square crop, I still just left them as a landscape ratio. A while back I read a article where they interviewed some landscape photographers that purely shot square landscape images. I was intrigued by the thought of this & fascinated with there thinking/processes around it & there results were impressive. They all said the same thing, its not something many people do & can work really well with a different mindset when out photographing. At this stage its not something ill necessarily go out of my way at doing but from now on hopefully I wont be put off by squarer compositions if the opportunity presents itself. With a few of my older landscape images I have cropped more square & while they still look a bit funny to me they are improved by it. None more so then the one below

Autumn Reflections – Armidale, NSW

Original crop

Some essentials for my photography trips
I never go on a trip without these
This is by no means a complete list as I haven’t included some obvious ones like a good camera bag & tripod but more so some that may not be on everyone’s mind when packing for a trip.

I never go on a trip without these
Batteries, batteries & more batteries
You can never have too many fully charged batteries, particularly when your camping off grid. I have 10 genuine canon LPE6 & LPE6N batteries, plus 2 jupio batteries (which I have found to go flat a lot quicker then the genuine canon batteries). I always have 3 or 4 spare fully charged batteries in my camera bag & each evening ill charge up any flat batteries so I always have plenty of fully charged spares. I have a third party USB battery charger that I can charge from my powerbanks & from my large battery that runs my fridge/freezer which I keep charged with solar panels. I also take one of my genuine canon chargers so if I do go somewhere with power I can use that as well.
Laptop, external hard drive & card reader
Every evening I back up all the photos I took that day to my external hard drive, although if im off grid I may do this every second evening or when I think ive taken some really good photos as im unable to charge my laptop when off grid. Its always nice to know that if something was to go wrong with your card or worse still you lose your camera etc then at least you still have copies of all your images.
Second camera body
My camera gear regularly gets wet, from rain, waves, waterfall spray, there’s rarely a trip that it doesn’t get a wash at least once. My camera bodies (Canon 5DS & 5DsR) & lenses (Zeiss Milvus 21mm & Canon EF 70-300mm f4-5.6 L) are fully weather sealed but this doesn’t mean over time water wont get inside the camera & do damage. The first time I encountered this was when I was photographing waterfalls in the Blue Mountains with showers on & off throughout the day. Next day the camera wouldn’t turn on, I spent a hour or so with the utes air con on high drying out the camera & luckily that did the job & never had a problem with it for the rest of the trip. Second time this happened was when I was out at the Flinders Ranges photographing a storm, again luckily after drying out it came good & I was able to keep taking photos. I did notice there were some issues like not being able to turn the camera off so I would have to take the battery out to turn it off. I ended up sending it to canon for them to have a look at it once I got home. At this point I decided I really need a spare camera body, I couldn’t find a Canon 5DsR anywhere so ended up with a Canon 5Ds. Having a second camera body also means a lot less swapping over lenses which is nice. I have also bought a rain cover for my camera, while it does a good job of keeping it dry its quite annoying to access the buttons & I ended up having to cut the plastic part out to see the live view screen as it kept on fogging up. If your camera/lens does get wet don’t leave it in your camera bag over night or anywhere enclosed, leave it out so it can dry.

The camera had recovered in time for this sunset. Razorback Lookout – Flinders Ranges NP, SA
Paper towels
Theres nothing more frustrating to go over your images & notice water droplets ruining your photos. The best way I found to deal with water getting on the lens is to have some paper towels, it soaks it all up & doesn’t leave any marks. When I was at Uluru photographing the waterfalls & cascades there was a constant drizzle, not wanting to wait till the drizzle stopped as by then the waterfalls may have turned to a trickle I shoved a heap of paper towels in my pockets & used them to constantly clean the lens everytime I took a shot. Most images didn’t end up with any water drops on them although a couple were a bit foggy, probably from not switching over the paper towels often enough. So wether your at the beach, a waterfall or in the outback its always a good idea to have a roll of paper towels.

Kantju Gorge – Uluru, NT
Remote shutter switch
I have two Canon RS-80N3 remote switch’s that plugs into the camera by a cable, I decided against one of the battery controlled ones as theres always the chance of the battery dying at the worst possible time. Some say theres no need for them at all as cameras have inbuilt delayed shutters that allow you to choose how many seconds after pressing the shutter button the camera takes the shot, therefore you can take photos with no blur from pressing the cameras shutter without a remote switch. Though i much prefer to be able to take a photo as soon as I press press the shutter, particularly when theres movement in the image like waves so I always use a remote switch when taking landscapes.

Groyne – Port Fairy, Vic
Polarizing filter
The only type of filter I own is a Zeiss circular polarizing filter & is a must have when photographing rainforests & waterfalls to reduce glare from foliage, rocks & water. In saying that I still like the look of some that are taken without one like the one below.

Without a Polarizing filter. Triplet Falls – Great Otways NP, Vic

With a Polarizing filter. New England NP, NSW
Emergency communication & a detailed paper map
Im amazed how many people still get caught out on hikes or 4wd trips with no Emergency communication. I have a Personal Locater Beacon that stays in my camera bag, it takes up hardly any space, very affordable & if anything serious happens all I have to do is extend the antenna & press a button. I also have a satellite phone with a spare battery, I can charge the batteries from my camping battery that runs my fridge/freezer. The satellite phone doesn’t only mean I can notify emergency services if anything goes wrong but I can explain the situation to them. I can also call someone for non-life threatening emergency’s like spare parts for the ute etc. Its also very handy for getting weather/road closure updates as well. Satellite phones & plans are more expensive then Personal locator beacons but are much more practical especially if you travel through remote areas fairly regularly. So I would say a PLB is essential for anyone doing long hikes or a remote trip & a satellite phone is a very good option.
Theres quite a few detailed GPS navigation maps available now although personally I just use a good quality detailed paper map, there’s no battery that will die on you or a computer glitch that can go wrong. I would say a detailed paper map is essential, even if you have a GPS navigation so you have something to fall back on if something goes wrong with it. A good GPS navigation would be very handy but I haven’t needed one so far. Its quite surprising some of the remote dirt roads that are on google maps but NEVER rely on google maps when on remote dirt roads.

Not somewhere you want to get stuck in a emergency without any ways of communication. Noccundra, QLD

Environmental impacts of Landscape photographers
Theres no way of escaping the fact that most things we humans do have a negative impact on the environment
Theres no way of escaping the fact that most things we humans do have a negative impact on the environment some way or another. This includes Landscape/nature photography & most definitely myself. Some say that landscape & nature photographers often capture the effects of human activity on the environment. And that these images serve as a powerful reminder of the consequences of irresponsible actions like deforestation & climate change. I think occasionally a few powerful images can help this slightly but by & large I think this is mostly something photographers like to tell themselves to feel better about there hobby/occupation as Climate change/deforestation is not only still occurring but getting worse. The negative impact of photographers from the rare heavy metals that go into making our gear to the km we travel by planes & cars far outweighs any positive impacts we have. Like all gadgets from photography gear, smartphones, cars etc big companies are continually bringing out updated models because so many of us want the latest & flashiest one we’ll upgrade even when our older one is working perfectly well.
I might not have taken a plane anywhere but I took myself & the ute down to tassie on the boat (spirit of tassie). And I don’t even want to work out the km ive travelled driving my diesel ute around the country since I got into photography.
Even the room our websites take up on the web (including this article on environmental impacts!) has its negative impacts. When images etc are uploaded to websites/socials they reside in data hubs. Data hubs consume a lot of energy, usually fossil fuels to stay cool.
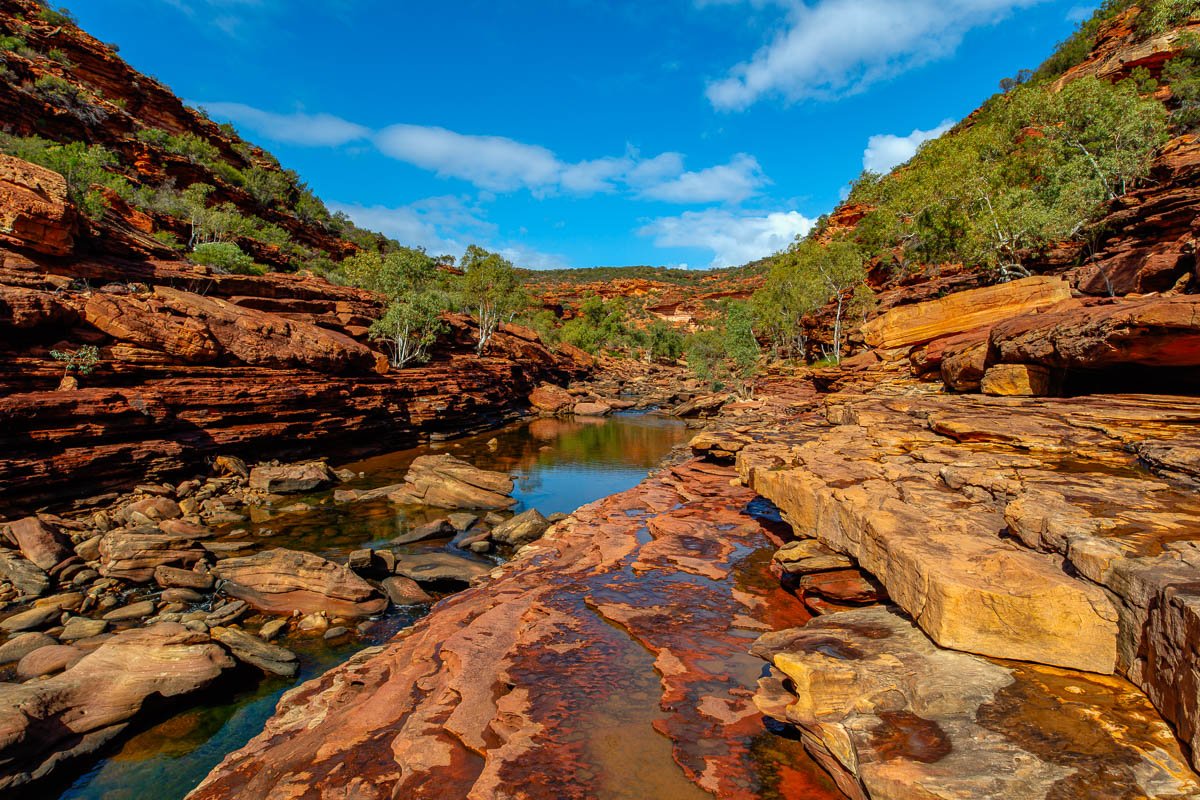
Long way from home - 4,593km to get to Kalbarri NP, WA
2023 I spent 5 weeks on my Tassie trip, 4 weeks through Central Australia, 7 weeks in southern WA, 2 weeks on the south coast NSW & three weeks in southern queensland. Plus 4 other small camping trips around the Mid North Coast NSW
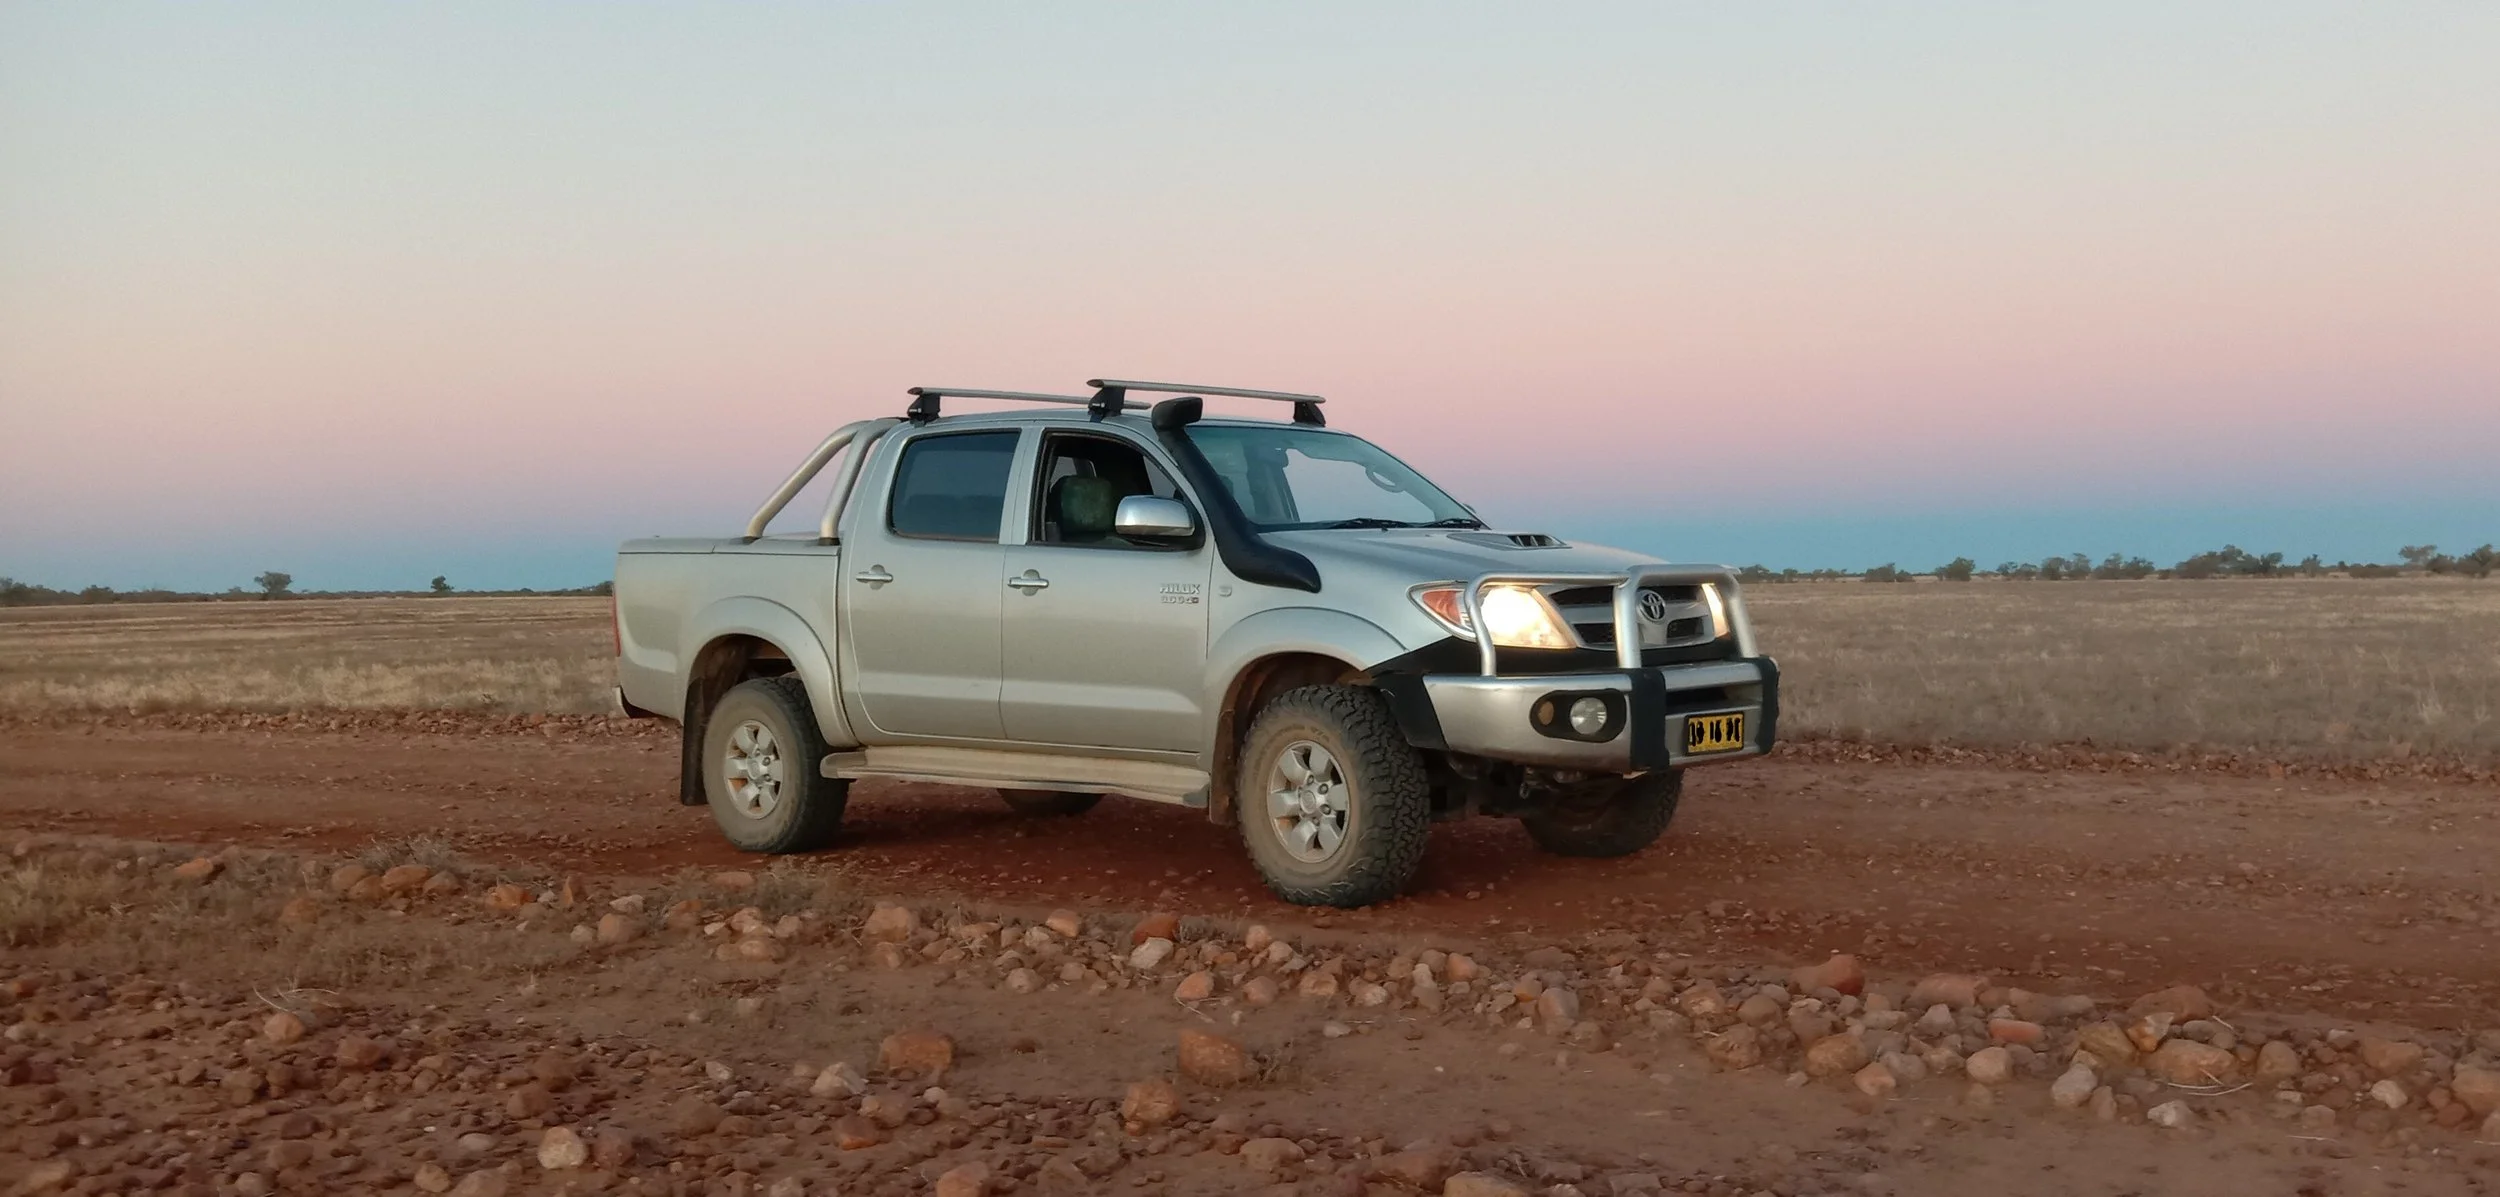
‘The Beast’ certainly had a big 2023 burning diesel across the country
Ways that I try to limit my impacts
Travelling & photography is a passion of mine that i wont be giving up anytime soon but there are little things that I do to try to limit my damage, while they obviously don’t come near to making my travelling environmentally friendly it is better then nothing.
I don’t have campfires – Any bit of wood you pick up for a campfire will be home to numerous insects & eventually will break down into the soil adding organic matter/nutrients to the soil. Also anywhere in Central Australia plants are generally extremely slow growing so the bits of wood your burning cant be replaced naturally quickly.
I rarely fly my drone anymore – This can help with not only disturbing other people but native animals like shorebirds
Using my solar panels to charge all my gadgets even if I have access to mains power
I drive slowly & rarely use the air con
Stay in a area for longer – this equals less km travelled for the trip
Don’t sell prints overseas
Limit overseas travel – im yet to travel overseas or anywhere by aeroplane
Do more local photography trips rather then big trips across the country
Dont upgrade my camera gear until they die/cant be repaired – Buidling a camera takes a lot of energy & rare heavy metals. Same goes for my ute.
Dont venture off track when bushwalking or driving & i never drive on beaches
Buy Australian made products where I can & good quality products that will last
Donating to environmental charities like Greenfleet, Bush heritage & wilderness society. Also donating % of profits to these charities.
I don’t have any social media & I don’t advertise ‘Secret Spots’ just to get noticed/likes which end up getting crowded/damaged from tourists.
Keep any recyclable rubbish until I find somewhere I can recycle it or take it home with me. always get rid of rubbish in suitable bins & if the bin is full then keep it until I find a bin that isn’t overflowing. If I see any rubbish on a hike/beach I pick it up.

Rubbish I picked up after a sunrise shoot at Lucky Bay – Cape Le Grand NP, WA

Editing my Photos
Editing brings out the best of a photograph, but it wont make a bad photo good
Its always great to download photos from a trip on the computer & finally see how they turn out on a bigger/better screen & edited. A lot of the time some will turn out better then expected while others that at the time of shooting thinking i was on a winner dont quite turn out so good. Like most i shoot everything in Raw so every photo needs some editing to get as natural & what it was like at the time of pressing the shutter. Its hard to get them perfect but im confident that i get pretty close with most of my images. Photo editing software nowadays is very powerful & the things you can do with a image is endless like taking one sky from a landscape image & swapping it with a more eye catching sky from another image. For people that are skilled enough with editing software they can easily do this with it being very hard/impossible for anyone viewing the image to ever know about it, & with AI its only going to get worse. Personally i wouldnt get any enjoyment out of this, the best part of photography for me is to be out in nature experiencing a great sunset/storm & the whole lifestyle of camping/touring the country, but as long as photographers arent displaying/selling these highly edited images without clarifying what they have done to get there images then each to there own. Sitting in front of a computer screen for too long isnt my idea of a good time & i believe if a image requires a lot of editing then the light wasnt ideal so its never going to turn out great or look natural (not to mention my photo editing skills is very basic). I mainly shoot in ideal light conditions & tend not to take photos in high contrasting conditions that would require taking multiple images with different exposures & then blending them together (all of my images are taken with single shot). So the editing that goes into most of my images are done pretty quickly & its a fairly similar process for each image. I use lightroom for nearly all of my edits plus Photoshop to clone out (remove) anything in the image, things i clone out are small items in the image that are non permanent, unnatural things & dust bunnies (bits of dust that are on your sensor which show up in your images particularly in the sky areas). Some would argue you shouldnt remove anything which i get, but at the end of the day im happy with my photos & the editing that goes into them. I dont do it for the money (i fund my photography trips/gear through my own gardening/landscaping business that i started up over 14 years ago) & i certainly dont do it for the Likes as im not on any social media so i have the freedom to take photos i like, no pressure to produce images that will appeal to the masses online & if i find a great location but dont end up getting a good photo there then ill just re visit the spot another time & hope i get better conditions.
Below is a good example of what kind of edits i make & the results of it. First off i changed the profile from adobe color to Adobe Landscape, then increased exposure by +0.26, increase contrast +20, reduce highlights -40, increase shadows +80, darken blacks -20, increase clarity +8, dehaze +9, increase vibrance +20 & increase saturation +17. with sharpening increase amount to 50, detail to 50 & luminance to 70, then click remove chromatic aberration. This is the order i do my edits but i always have to go back over & readjust exposure/shadows etc to get right. After all that then i open the edited version into photoshop to clone out the unwanted bits.

This is the Raw image without any edits, as you can see its quite dark & wasn’t what it was like through my eyes so needs some editing. Horseshoe Bay - South West Rocks, NSW. Canon 5DS R + Zeiss Milvus 21mm f/2.8 @ 21mm ISO 100, 2.5 sec, f/14

This is the final edited image. I think its very close to a true representation on what it was like at the time of taking the photo. Notice the things i cloned out were the dust bunny top left in sky, the two sets of towels on the sand on the left & the two blurry swimmers in the water.
The above example is a very easy image to edit with no high contrasting bright & dark areas which is one of the reasons i love photographing on cloudy days. High contrasting photos can be a lot harder even with todays cameras having pretty good dynamic range. Shadows are much easier to recover detail then bright areas so its always good to under expose in these situations, but sometimes you just have to try your best with mixed results & appreciate how good our eyes are while our cameras arent always up to it. The below example is a high contrasting image that i think turned out well even though there are areas in the image that arent perfect due to the high contrast (mainly the dark areas). The following edits i made in lightroom for it were exposure +0.61, contrast +19, highlights -14, shadows +63, blacks -18, clarity +7, dehaze +11, vibrance +18, left saturation at 0, colour blue -15, sharpening 55. detail 55, noise reduction - luminance 55 & click remove chromatic aberration.

Unedited Raw image, underexposed to keep the detail in the bright section of sky. Canon 5DS R + Zeiss Milvus 21mm f/2.8 @ 21mm, ISO 100, 1/5 sec, f/8

Edited version, overall not bad considering the conditions. This one is a bit darker when uploaded to this page for some reason.
Below is another high contrasting image. This was taken early one morning (Note the one bright star still visible) looking east so no chance in recovering much detail in the shadows but luckily a silhouette works well here. The following edits were change profile to adobe landscape, contrast +7, highlights -51, blacks -21, clarity +5, dehaze +4, vibrance +16, saturation +14, sharpening 50. detail 50, noise reduction - luminance 55, click remove chromatic aberration & levelled horizon . Then in photoshop i cloned out some of the dead Pandanus leaves in the foreground that were reflecting the light
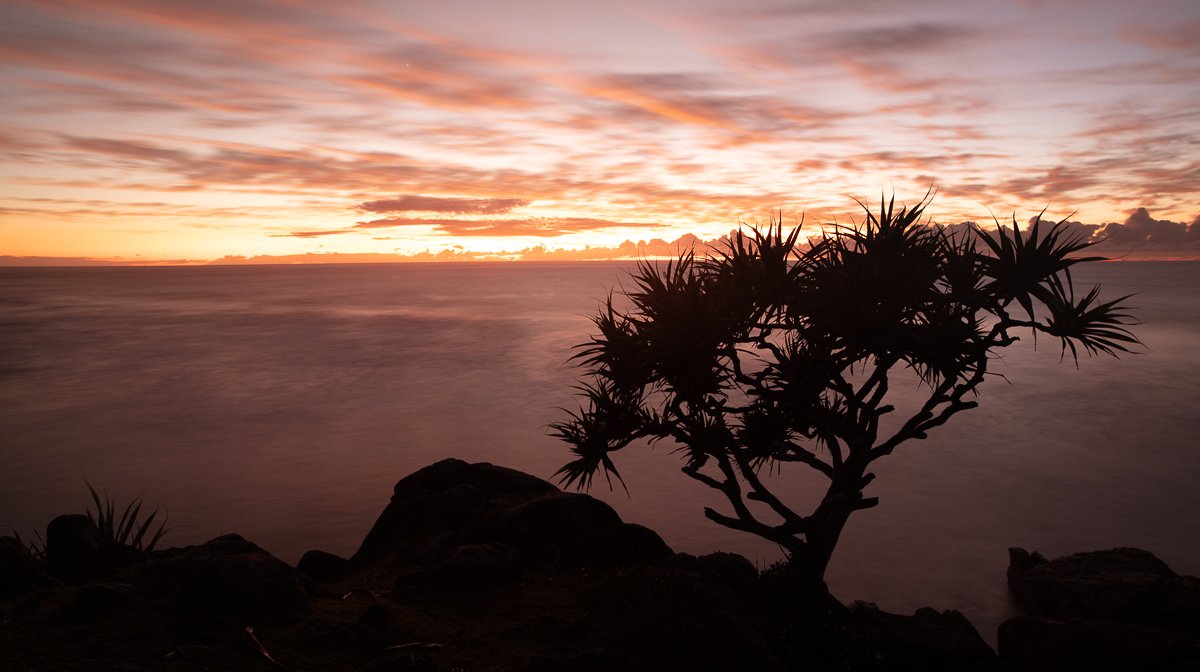
Unedited Raw image. Pandanus Tree - Little Bay - South West Rocks, NSW. Canon 5DS R + Zeiss Milvus 21mm f/2.8 @ 21mm, ISO 100, 25 sec, f/7.1

The end result which again im pretty happy with
The below shot is one of my favourites & unlike the two above there is brilliant detail right throughout the image. The following edits were change profile to adobe landscape, exposure +0.97, contrast +21, highlights -47, shadows +80, whites +7, blacks -18, clarity +9, dehaze +12, vibrance +18, saturation +15, sharpening 50. detail 50, noise reduction - luminance 55, click remove chromatic aberration.

Unedited Raw image. Bay of Fires - Tasmania. Canon 5DS R + Zeiss Milvus 21mm f/2.8 @ 21mm, ISO 100, 0.8 sec, f/13

Who needs a colourful sunset when your at a spot like this plus so easy to process
Below is the most ideal conditions for photographing rainforests/waterfalls - overcast & foggy. I used a Zeiss circular polarizing filter to reduce glare. The following edits were change profile to adobe landscape, Exposure +35, contrast +21, highlights -21, shadows +60, whites +21, blacks -18, clarity +9, dehaze +5, vibrance +19, saturation +15, colour blue saturation -13, sharpening 50. detail 50, noise reduction - luminance 55, click remove chromatic aberration.

Unedited Raw image. Lamington NP - Queensland. Canon 5DS R + Zeiss Milvus 21mm f/2.8 @ 21mm, ISO 100, 10 sec, f/8

This sunset i had no trouble with blown highlights or dark areas as the colour formed to the east. The following edits were change profile to adobe landscape, exposure +0.18, contrast +23, shadows +21, whites +37, blacks -20, clarity +7, dehaze +7, vibrance +18, saturation +14, blue saturation -13, sharpening 50. detail 50, noise reduction - luminance 65, click remove chromatic aberration.

Unedited raw image. Currumbin - Queensland. Canon 5DS R + Zeiss Milvus 21mm f/2.8 @ 21mm, ISO 100, 0.3 sec, f/9

Final edited image
As you can see when shooting in Raw you need to edit your photos to get them looking there best with the challenge of not going over the top. Shooting in jpeg your allowing the camera to make the edits for you & while they often turn out ok, a correctly edited raw image will always give you the best/most natural results. Editing brings out the best of a photograph but it wont make a bad photo good.

First time Photographing Surfers
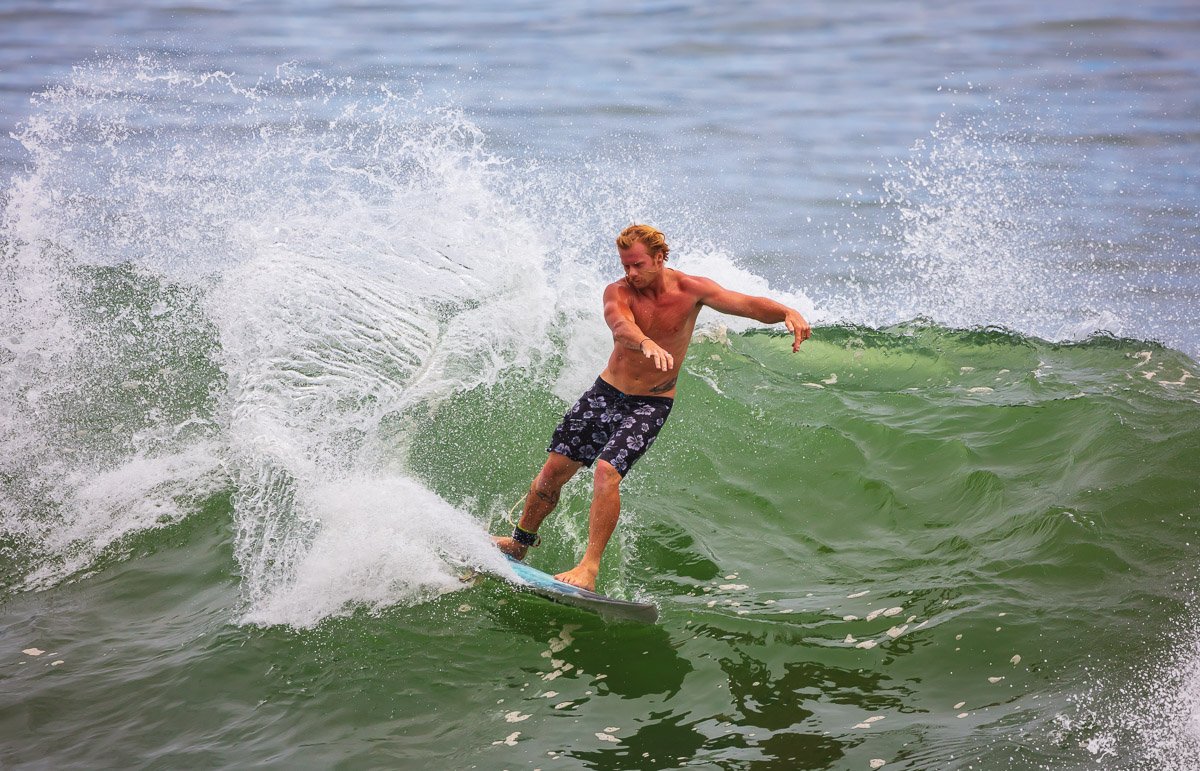
Most of the time there isnt much good surf at South West Rocks but when conditions are right the local surfers make the most of it
Most of the time there isnt much good surf at South West Rocks but when conditions are right the local surfers make the most of it. One of those times i decided to go grab my Sigma 150 - 600mm lens & camera to have a go at photographing them. It was so much fun i ended up staying there all day long. I started out shooting handheld then ended up getting my tripod to give my arms a bit of a rest. You quickly learn the better surfers to follow as the more skilled ones will catch more waves/perform better which makes better photo opportunities. Overcast conditions (high cloud) throughout the morning made for better light compared to the afternoon. Like with all my wildlife/action photography these were taken with single shot, burst mode would increase my chances of getting a good shot but i enjoy using single shot. Im pretty happy with my results & hopefully i get to take more in the future.

Canon 5DS + Sigma 150-60mm @ 500mm, ISO 640, 1-4000, f/7.1

Canon 5DS + Sigma 150-60mm @ 500mm, ISO 640, 1-2500, f/8

Canon 5DS + Sigma 150-60mm @ 500mm, ISO 800, 1-5000, f/6.3

Canon 5DS + Sigma 150-60mm @ 468mm, ISO 640, 1-2500, f/8

Canon 5DS + Sigma 150-60mm @ 500mm, ISO 800, 1-2500, f/7.1
Canon 5DS + Sigma 150-60mm @ 500mm, ISO 640, 1-3200, f/7.1

This one was taken around 6 months later, the water is a bit dirty after some rain (the mouth of the Macleay River is at South West Rocks). Canon 5DS + Sigma 150-600mm @ 600mm, ISO 800, 1/2500, f/7.1

Abstract Photography
One type of style of photography ive started to spend a bit more time on is abstract photography
One type of style of photography ive started to spend a bit more time on is abstract photography, mainly abstract nature but hopefully more abstract landscapes too in the future (ive found abstract nature photography to be easier then abstract landscape photography). I love the creativity of it, the fact your not so reliant on ideal weather conditions so you can take them throughout the day & most of all they just look really cool. Now some of my ‘Abstract’ photos are leaning towards close up photographs then true abstracts but I am very much a beginner in this field & over time will improve.
When shooting smaller subjects I use my 100mm macro lens. I generally like to fill the frame with the object but sometimes its better to leave a bit more room for cropping & if your having trouble getting everything in focus with close ups you may have to take it a bit further back. In saying that out of focus can work really well in abstract photography (and most other photography as well). When I can I always use a tripod even when im intentionally shooting blurry photos.
After a failed sunrise shoot at Gibraltar Range NP I had a long walk back to my ute, along the way back I noticed all these colourful Eucalypt leaves along the track with water droplets from light showers overnight & thought theyd make a cool photo. Luckily I had my macro lens in my bag & by the time I got back to my ute I had a heap of images with every colour of the rainbow. I think these ones best represent abstract photography from my collection & are my favourites so far.

Eucalyptus leaf – Gibraltar Range NP, NSW

Eucalyptus leaf – Gibraltar Range NP, NSW
Rocks are fantastic subjects with there different shapes & colours. I use both my 100mm macro lens & my 21mm wide angle lens when photographing rocks. I prefer overcast conditions or early morning/late afternoon so the light isn’t too harsh & you can capture great detail. I like to imagine there taken from a plain looking down on a harsh barren landscape. The ones below were all taken with my 21mm lens.

West Beach - Fitzgerald River NP, WA

West Beach - Fitzgerald River NP, WA

West Beach - Fitzgerald River NP, WA
Tree bark can also give you some great patterns & colour to play with. Both taken with the 21mm lens.

Tingle Tree Bark – Walpole-Nornalup NP, WA

Giant Tingle Tree – Walpole-Nornalup NP, WA
Banksias are one of my favourite flowers to photograph close up showing there incredible shapes & colours, there large size also helps with filling the frame. My next challenge is when photographing smaller flowers is having a very shallow depth of field & see if I can get some abstract images that way. These ones are definitely leaning towards close ups but as subjects they have great potential.

Banksia Formosa – Torndirrup NP, WA

Banksia praemorsa - Torndirrup NP, WA

Banksia menziessi – Nambung, WA